The other day my friend brought us over a treat–little almond butter balls with puffed millet in them. She inspired me to try to recreate the Morning Peanut Butter bars that our local gluten free cafe The Flying Apron makes but as little balls rather than bars.

I’m trying to find more kid friendly things to eat as well as things that are better for me than chocolate or starchy snacks. This is a good sweet treat that is satisfying. I’m still tweaking the amounts, so feel free to play yourself. (Update, I went by Flying Apron later in the afternoon and bought a Morning Peanut Butter bar to compare. They have a lot more mix-ins. Not more ingredients just more densely packed peanut butter. My recipe is now updated to have more “stuff” because it helps with the stickiness and with the sense of too much peanut butter…although both ways are yummy).

Peanut Butter Sticky Balls

1 cup crunchy salted peanut butter (or unsalted. I am, sadly, a salt fiend but unsalted would probably taste a little healthier)

1 cup gluten free rolled oats

1/2 cup unsweetened shredded coconut

1/4 cup raw sunflower seeds

3/4 cup raisins or golden raisins

1/4 cup maple syrup

1 Tbsp brown rice syrup (or you can probably sub another liquid sweetner)

1/2 tsp vanilla

1/4 tsp ground cinnamon

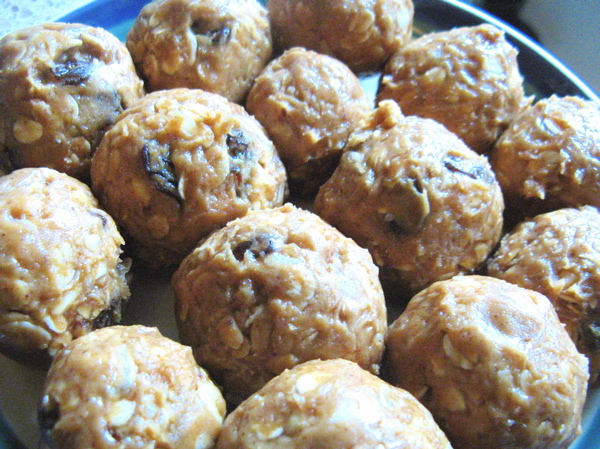
Put oatmeal and coconut in the blender to chop up a bit finer. You might want to chop the sunflower seeds a tad as well. Dump and scoop everything into a medium bowl, stir and mix, and then roll into little balls. Place in the fridge and let sit for half a day so the oatmeal absorbs some of the moisture of the peanut butter. You can eat them right away too. We did.

Also, you might prefer to store them in the fridge depending on the season and how warm it is where you are. This makes 18 or so little balls.

It’s been a long day full of children who refused to nap. And, oh, they so needed one and mommy as well, so I’ll get right to the recipe. These are my favorite biscuits, though, and the fact I’ve had some success makes me eager to post. This is my GF version of a recipe in Bread Alone by Daniel Leader and Judith Blahnik. This is a book of great European style (read takes 14 hours to make) yeast bread recipes which tragically my husband never fully succeeded at no matter how many weekends he devoted. He later learned the reason–all the temperatures are off. However, the biscuits are a quick bread so no worries. The secret to their addictive flavor is caramelized onions. Mmmm. And they were still tasty after a turn in the toaster oven days later. Sadly, I forgot to take pictures. I’ll have to add them later since I’ll certainly be making more of these.

This is my first attempt so if anyone has advice for tweaks feel free to pass them my way.

Rosemary Drop Biscuits

7 tbsp chilled butter 1 medium onion, chopped
2 tsp chopped fresh rosemary

2/3 c sorghum flour
2/3 c brown rice flour
2/3 c tapioca flour
2 1/2 tsp baking powder
1/2 tsp baking soda
1 to 2 tsp xanthan gum
1/2 tsp salt
1 egg

1 cup cold buttermilk

Melt 2 tbsp of the butter in a skillet, then add the onion and cook over med-high heat for 3 minutes. Add the rosemary and continue cooking for around 3 minutes more. Remove from heat once the onion is quite soft and turning a golden brown. Drain well then cool completely.

Preheat oven to 450 degrees.

Mix the dry ingredients in a large bowl then cut in the butter. (I used Mary Frances’s technique of grating the butter in which she got from Kate at Gluten Free Gobsmacked). Work the mixture until it resembles course crumbs. Then add in the cooled onion mixture, working it in thoroughly. Pour in the buttermilk and egg and stir it just enough to form the dough. (My dough was thinner than I expected but I worked out fine.)

Drop dough by heaping tablespoonfuls or whatever size makes you happy onto an ungreased baking sheet. Bake about 12 to 15 minutes and serve immediately. WARNING: high risk of eating them all in one sitting.

(I posted this the other week on my previous blog but thought I’d transfer it over here because these cookies were so yummy).

I love, love, love oatmeal raisin cookies. I must confess they are my favorite. They seem perfect to me, sweet enough to satisfy my craving with enough healthy stuff I have little guilt. I’ve been wanting to try making a GF version for awhile now, but I was diagnosed right after Thanksgiving which meant I had to figure out how to make my favorite Christmas cookies first (which, I have to say, were marvelous and gave me great hope for gluten-free eating). Then I had to recover from all the Christmas cookies.

But last weekend I was finally ready. The first batch was very very sad. I could hardly scrape them off the pan, and once on the cooling rack I could see the countertop through the thin collapsed cookie. However, they tasted great! I felt hopeful. So I took my dough and kneaded in more rising agent (I think I added baking powder when I hadn’t before?) and then I added more flour. The next batch was much much better. A couple more tweaks and woot! Oatmeal raisin cookie perfection. Mind you, I’ve only made them once but I was so excited that I wanted to share. Here goes.

oatmeal raisin cookies

Oatmeal Raisin Cookies

3/4 cup butter, softened
3/4 cup white sugar
3/4 cup packed light brown sugar
2 eggs
1 teaspoon vanilla extract
1/2 cup tapioca flour
1/2 cup brown rice flour
1/2 cup sorghum flour
1 teaspoon baking soda
1/2 teaspoon baking powder
1/4 teaspoon xanthan gum
1/2 teaspoon salt
2 3/4 cups rolled oats
1 cup raisins

Preheat oven to 350 degrees F.

Cream butter and sugars together. Then add in eggs and vanilla and beat until fluffy. In another bowl whisk together dry ingredients except for the oats. Slowly beat into the butter sugar mixture. Stir in oats and raisins. Get out all the cookie sheets you have because this makes a lot of cookies (you’ll need them, trust me. Mine have gone fast!). Drop by teaspoonful onto the ungreased cookie sheets. Bake for 10 minutes in the preheated oven. Check on them and if they don’t seem quite done leave them in one more minute. (10 minutes seemed like too little but 11 minutes was too much. It must have been that moment of opening the door to check them, giving them 60 second more time, and then pulling them out that did the trick.)

Let them cool just a bit so they aren’t too gooey to transfer to a wire rack, then move to rack and let cool. Make sure you sneak one or two while they are cooling.